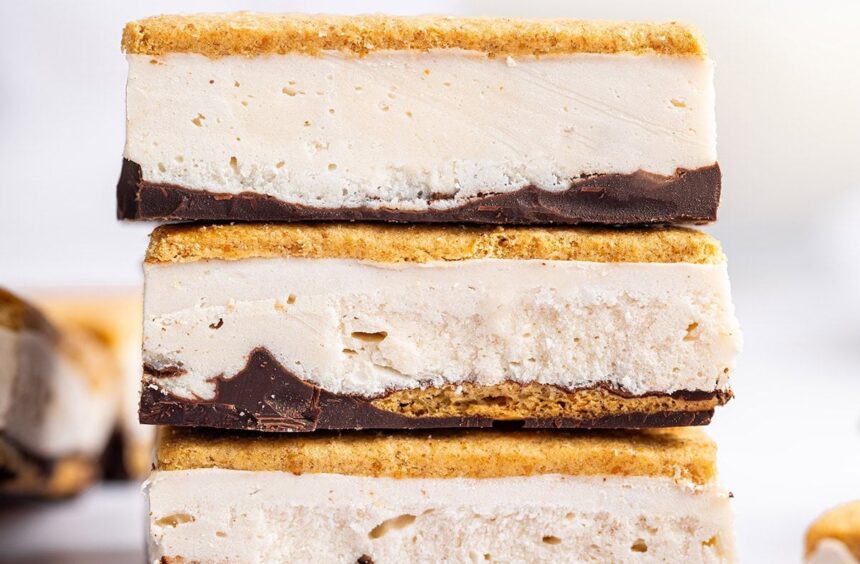
These viral **frozen s’mores** represent a modern twist on a classic summer delight—think rich melted chocolate as the base layer, complemented by a protein-packed, whipped coco whip filling, and finished with crunchy graham crackers. They are designed to be your go-to frozen treat all season!
Earlier this year, my viral recipe for protein-packed frozen s’mores gained significant traction on Instagram—and now it’s officially making its debut here! This delightful dessert swaps out traditional marshmallows and campfire hassle for a sophisticated approach: layering decadent melted chocolate with a fluffy, nutritious filling made from coco whip (which you’ll need to thaw first) and classic graham crackers. The result is an easy-to-slice frozen treat that’s just as simple to enjoy.
***
Why You Gotta Try This One
I’ve experimented with countless nostalgic dessert recipes, but this version of a frozen s’mores truly marks the game-changer. The filling delivers that signature sweet spot reminiscent of your favorite ice cream bar or s’mores treat!
Beyond its nostalgic appeal and delicious taste, what makes these protein frozen s’mores particularly special? They require just four simple ingredients, no baking is needed, and crucially, they are secretly packed with protein—offering satisfying dessert vibes without a sugar crash. Plus, their inherent kid-friendly nature (a layer of graham crackers!) means my children always think it’s a legitimate ice cream alternative!
***
Ingredients Needed
Here are the essential components to craft these irresistible frozen bars:
- Coco Whip: This serves as your marshmallowy, fluffy core filling. Ensure it has thawed before incorporating.
- Vanilla Protein Powder: Adds a substantial protein boost while supplying that essential sweet vanilla flavour. I personally favoured Truvani vanilla protein powder; however, any clean and tasty brand will perform admirably.
- Graham Crackers: These form the crunchy sandwich layers. For my gluten-free preference, brands like Trader Joe’s or Partake Classic Graham Crackers were excellent options—I encourage you to select based on your taste preferences.
- Lily’s Chocolate Chips (or similar): Melted chocolate creates a rich and deep flavour base layer. Again, feel free to use your favourite brand for optimal results.
Make It Your Own
Here are some creative ways to personalize these frozen s’mores:
- Add Nut Butter Swirls: Stirring in a swirl of peanut butter or almond butter enhances the flavour profile, offering a delightful salty-sweet contrast.
- Increase Crunch Factor: Elevate the texture by sprinkling crushed pretzels, toasted coconut flakes, or finely chopped nuts throughout the layers.
- Elevate Filling Flavors: Infuse complexity into your coco whip filling with additions like cinnamon, a hint of espresso powder, or even a dash of peppermint extract—each offers an exciting variation!
***
How to Make Protein Frozen S’mores
The construction process is straightforward:
Step 1: Begin by lining the base of an 8×8 baking dish with parchment paper. Carefully arrange a single layer of graham crackers (often best placed upside down) to cover the bottom.
Step 2: Melt your chosen chocolate chips—either directly in a microwave-safe bowl using short bursts, or gently employing a double broiler method for even melting.
Step 3: Once the chocolate melts, spread it evenly over the graham crackers. Place this layered dish in your freezer or refrigerator for a brief period—this slight cooling step helps set the layer and prevents a messy filling from seeping into the chocolate.
Step 4: While waiting for the chocolate to firm up slightly, whisk together your coco whip and protein powder until smooth and well-fluffed.
Step 5: Apply the prepared fluffy filling evenly over the cooled chocolate layer.
Step 6: Carefully place another layer of graham crackers (this time, right side up) on top. Gently press them down to ensure they are fully immersed in the filling and provide a stable bite point once frozen solid. Cover the dish with parchment paper or foil if preferred before transferring it securely into the freezer. Allow at least two hours for freezing until firm—adjusting time as needed based on your desired level of hardness.
***
Brittany’s Tips for the Best Frozen S’mores
- Let the Chocolate Cool Just Enough: Ensure your melted chocolate firms up slightly before adding the filling, creating a cleaner cut and preventing any leakage.
- Parchment Paper Makes a Difference: Definitely line your pan beforehand; it simplifies lifting those perfectly formed bars out once frozen and helps with clean slicing.
- A Flat Freezer Ensures Even Frosting: If possible, use a flat surface in your freezer drawer for uniform freezing. This prevents uneven textures that can occur near the edges of a standard freezer compartment.
- Create a Smooth Base Feel: By placing graham crackers upside down (flat side up), you achieve a smoother base layer—enhancing the overall texture and feel reminiscent of classic ice cream sandwich construction.
- Clean Cuts Require Precision or Patience: These bars slice best straight from the freezer. Utilize a sharp knife for clean results, but if they are proving too hard to cut effectively, allow them to soften slightly at room temperature (2–5 minutes) before slicing and enjoying.
***
Storing Frozen S’mores
Once your frozen s’mores bars have reached a solid consistency, carefully transfer them into an airtight freezer container or a securely sealed freezer-safe bag. To prevent sticking during storage and when they are slightly thawed for serving, consider placing parchment paper between layers if you’re stacking them.
These delightful protein bars maintain their delicious quality in the freezer for up to two weeks—making them ideal for stocking away easily accessible summer desserts! Should they feel too firm upon removal from the freezer to enjoy immediately without cutting, simply allow individual bars or the entire batch to soften slightly at room temperature before taking a bite.


![Black Eyed Pea Chili With Corn Fritters [Vegan] – One Green Planet](https://top-100-recipes.com/wp-content/uploads/2026/03/chili1-150x150.jpg)

![Kohlrabi Chips [Vegan] – One Green Planet](https://top-100-recipes.com/wp-content/uploads/2026/03/kohlrabi-chips-1-150x150.jpg)