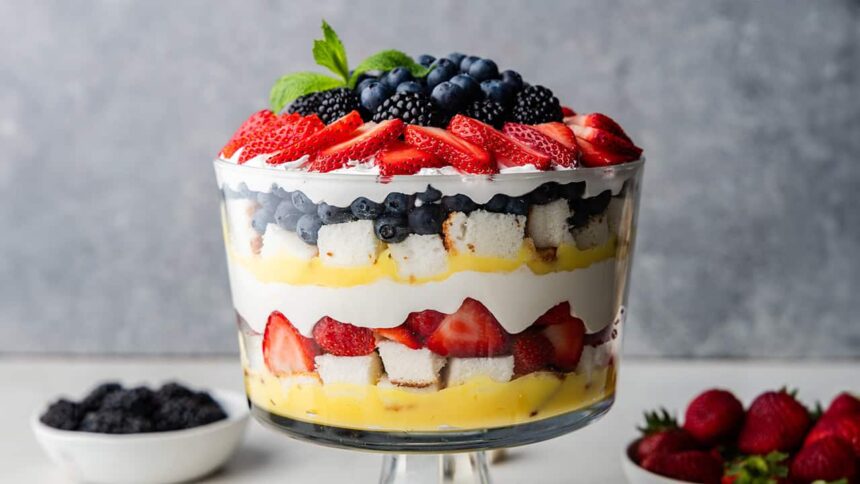
Fresh berries, lightly whipped cream, thick homemade pudding, moist cake – this fruit trifle dessert is filled with some of our favorite things. It’s an impressive dish to bring along to your next barbecue. Warm weather and fresh berries just go together so well, don’t they? When you add in a bit of homemade whipped cream and vanilla pudding you can’t go wrong.
Make your own angel food cake with Rachel’s perfect angel food cake recipe.
Why Our Recipe
- Optional homemade instructions for each step of the trifle to build from the ground up.
- Tried and true and a crowd favorite for years.
- This recipe is very simple to personalize with your favorite cake & berries.
Your guests will be in awe at how gorgeous and delicious this trifle dessert is. It’s also very simple to put together after you’ve done a bit of prep work! The hardest part will be having the patience to let it chill before you can dig in. It’s a relatively light dessert, so it’s perfect for a picnic or outdoor party. Perfect for potlucks and barbecues because it is a beautiful dish that will be the star of the show. You can build from the ground up with our homemade recipes for each component, or use store shortcuts for quick and easy assembly.
Ingredients
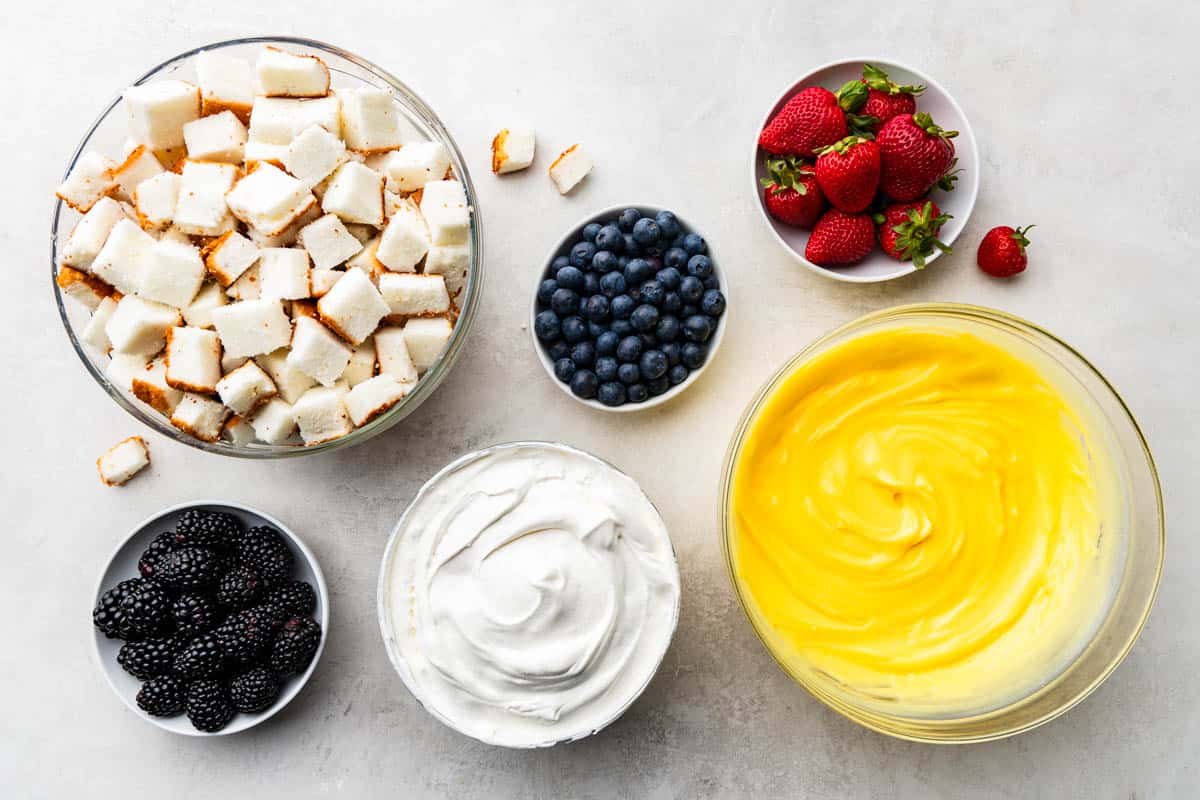
- Cake: You have a few options between angel food cake, sponge cake, and pound cake. Use your favorite!
- Fresh Berries: Be sure to use fresh, as frozen will turn to mush. Pick your favorite berries-blueberries, blackberries, raspberries, or strawberries. For the famous trifle look, visually arrange the fruit around the edge of the dish before filling in the middle.
- White Chocolate Pudding & Whipped Cream: We go crazy over our homemade whipped cream and white chocolate pudding. There’s something so satisfying about knowing exactly which ingredients you put into your food! That said, in a pinch, you can use store-bought.
Cake Options
This recipe uses Angel food cake, which acts as a blank canvas for other flavors to soak into it. Sponge cake is more of a traditional option and has a bit more dense texture than the light and airy Angel food cake, but doesn’t soak in as much flavor. For a more dense, decadent dessert, pound cake is your go-to. Each of these cakes will retain their shape when cut into cubes. We recommend avoiding a typical yellow cake as it will just crumble.
Serving Bowl Options
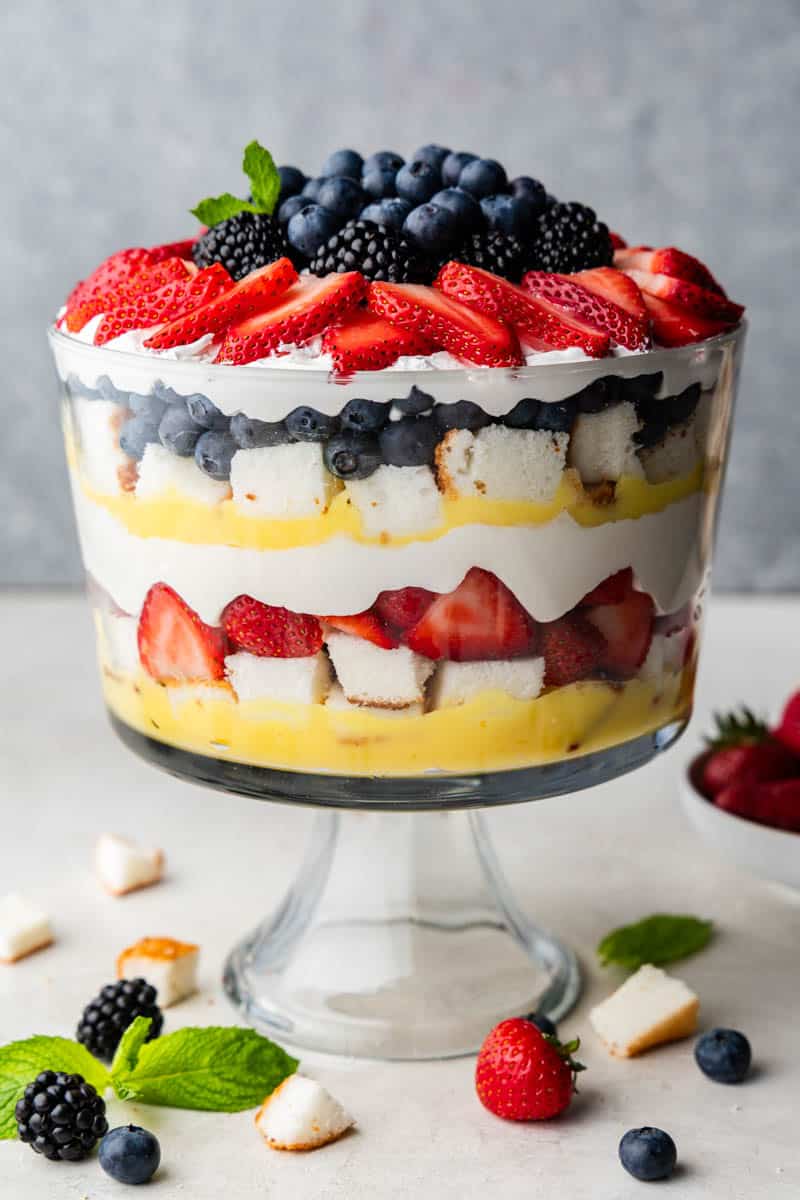
No trifle dish at home? No problem! There’s no need to run out to the store and pick one up. Unless you plan on becoming a fruit trifle aficionado, there’s no pressure to serve yours in a special dish. You can easily use a deep, glass bowl. Always try to go with a clear bowl – admiring the different layers of your trifle dessert is one of the best parts of making (and eating) this dish!
You can also layer your trifle in individual servings by using any small glass cup. Mason jars, ice cream bowls, clear plastic cups, or even a lowball drinking glass will work great.
Easy-to-Make Variations
This is a berry trifle recipe, but there are tons of variations out there! Here are some of our favorites to try now:
- Use a different flavor of pudding: Strawberry, pistachio, butterscotch, banana, caramel, lemon, or cheesecake come to mind!
- Try out different fruits: Peaches, nectarines, mangoes, bananas, or pineapples are all great options for trifles. The key is to use soft fruits.
- Make it a chocolate trifle: use chocolate pudding, chocolate cake or pound cake, and a chocolate whipped cream. Chocolate goes great with berries.
Make-Ahead Instructions
You can definitely make your dessert the day before you plan on serving it. In fact, some chefs swear by making this dessert ahead of time! It gives the flavors ample time to come together for even more yummy results. We recommend that you serve yours anywhere between 2 and 24 hours after you make it. Hold off on adding the top layer of whipped cream and berries until just before eating for the best results.
Storage Instructions
Refrigerate any unlikely leftovers by wrapping the serving bowl tightly in plastic wrap before placing it in the fridge for up to 3 days.


