
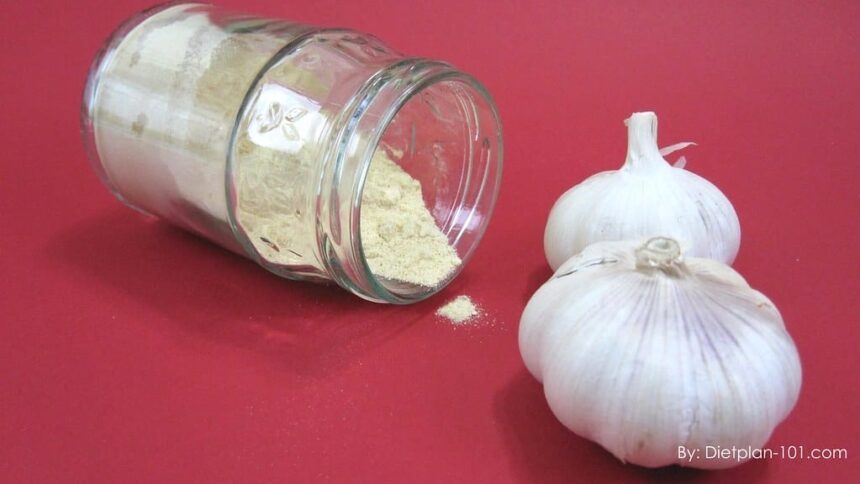

Having garlic powder on hand in your pantry is ideal for times when you have simply run out of fresh garlic or don’t feel like dealing with the whole peeling and chopping process.
Garlic powder is great for adding a little flavor to salads, bagel toppings, and pizza without having to use fresh cloves. Additionally, it is really easy to make for yourself, too. This is especially useful if you grow your garlic and want to preserve it in a way that is a little different than simply curing and storing your bulbs.
As well, pretty, labeled jars of powdered garlic make great culinary, homemade gifts.
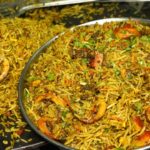
Sourcing Garlic to Dry and Powder
Source: MIgardener/YouTube
You can buy garlic bulbs from the store to make garlic powder with. However, if you get it from a local farmer’s market or grow it yourself, you will be getting garlic that is in season and will offer the best flavor. In temperate climates, this will be late mid-late summer and early fall.
If you grow your garlic, you will still have to take your garlic bulbs through the same curing process you would if you were just storing them whole for the winter (see video above).
How to Prepare the Cloves for Drying
Once you have your bulbs, you will need to break them up into individual cloves. Chop the root part from the bottom end and remove all of the paper. If you notice any brown spots on the peeled cloves, either cut them off or discard the clove entirely. You want good, clean, healthy cloves for this process.
Bear in mind that about one cup of whole garlic cloves makes about one-third of a cup of garlic powder. If you’re looking to make holiday gifts for the whole family, think about how much garlic you are going to need.
Next, slice the cloves into thin slices as close to thickness as possible. This will help the slices to dry out at roughly the same time.
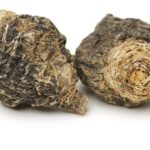
Methods for Drying the Garlic Slices
Source: Back To Reality/YouTube
How you dry your garlic will depend on the equipment you have access to. You may use a dehydrator, or your oven or even air dry it. Giving time estimations for how long the drying process will take should be taken simply as that—an estimation. Drying times depend on the type of oven or dehydrator you are using, the climate you live in, and the state of the garlic cloves you are working with. Your best bet is just to keep an eye on your garlic during the drying process to prevent any molding or burning!
- Dehydrator method– spread your sliced garlic out evenly across the dehydrator tray. Try to make sure that no slices are overlapping each other. Set your dehydrator to 115°F, pop the tray in, and check on it every 2 hours or so. The garlic is sufficiently dry when it crumbles in your fingers. Leave it to cool.
- Oven method– Set your oven to its lowest setting. Next, spread your sliced garlic evenly across a baking tray. Again, make sure that no slices are overlapping each other. Check your garlic every 30 minutes, and remove it as soon as it has that same crumbly texture. Leave it to cool. It should be noted that garlic is more likely to brown in an oven, making it potentially a little bitter. Some ovens simply won’t be cool enough.
How to Make Garlic Powder
Once the garlic has cooled, transfer it to a blender, coffee, or spice grinder, or keep it old school with a pestle and mortar.
Crush, grind or blend your garlic until you have the desired consistency. Next, pour the powdered garlic into airtight jars, label them and store them in a cool, dry place.
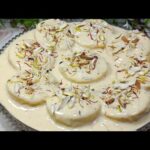
Taking It a Step Further!
Source: Back To Reality/YouTube
Now that you have jars of homemade garlic powder, how about ramping it up to make garlic salt? It is really simple and easily adaptable to personal taste. A basic ratio would be one part garlic to two parts salt. This can be altered at any point by adding a little more garlic if it’s too salty or a little more salt if it isn’t salty enough!
Any type of salt can be used, from table salt to sea salt. There is a lot of information out there about types and salt and their health implication that is worth delving into.
Once you have the salt of your choice, blend peeled garlic cloves and salt in a food processor. The end consistency should look like wet sand. Next, spread the mixture onto a lined baking sheet and pop it in the oven for about 10-15 minutes on the lowest setting.
Remove the baking tray and leave it to cool. Once cool, return what is now probably clumps of garlic and salt to the food processor and whiz it until you have a crumbly salt-like substance again. If you want to go even fancier, don’t be shy about adding some of your favorite dried herbs or crushed chili peppers to the mix, too.
Store your homemade garlic salt in a clean, dry jar in a cool, dry place.


![Berry Lavender Poached Pears With Granola [Vegan, Gluten-Free] – One Green Planet](https://top-100-recipes.com/wp-content/uploads/2026/03/berry-lavender-poached-pears-with-granola-d-150x150.jpg)